How to do Web Scraping with Puppeteer and NodeJS | Puppeteer tutorial

Rajinder Singh
Deep Learning Researcher
Web scraping is a powerful technique used to extract data from websites. In this tutorial, we will explore how to perform web scraping using Puppeteer and Node.js, two popular technologies in the web development ecosystem. Puppeteer is a Node.js library that provides a high-level API for controlling headless Chrome or Chromium browsers. It allows us to automate browser actions, navigate through web pages, and extract the desired data. By combining Puppeteer with the flexibility of Node.js, we can build robust and efficient web scraping solutions. Let's dive into the steps involved in scraping websites using Puppeteer .
So What is Puppeteer?
Puppeteer is a cutting-edge framework that enables testers to conduct headless browser testing with Google Chrome. With Puppeteer testing, testers can execute JavaScript commands to interact with web pages, including actions like clicking links, filling out forms, and submitting buttons.
Developed by Google, Puppeteer is a Node.js library that allows for seamless control of headless Chrome through the DevTools Protocol. It provides a range of high-level APIs that facilitate automated testing, website feature development, debugging, element inspection, and performance profiling.
With Puppeteer, you can use (headless) Chromium or Chrome to open websites, fill forms, click buttons, extract data and generally perform any action that a human could when using a computer. This makes Puppeteer a really powerful tool for web scraping, but also for automating complex workflows on the web. Having a clear understanding of Puppeteer and its capabilities is invaluable for both testers and developers in the modern web development landscape.
What Are the Advantages of Using Puppeteer for Web Scraping?
Axios and Cheerio are excellent options for scraping with JavaScript. However, that poses two issues: crawling dynamic content and anti-scraping software. Since Puppeteer is a headless browser, it has no problem scraping dynamic content.
Also Puppeteer offers a series of significant advantages for web scraping:
-
Headless Browser Automation: With Puppeteer, you can control a headless Chrome browser programmatically, enabling automation of browser actions like clicking, scrolling, filling forms, and data extraction without a visible browser window.
-
Full Chrome Functionality and DOM Manipulation: Puppeteer provides access to Chrome's complete functionality, making it suitable for scraping modern websites with JavaScript-heavy content. You can easily interact with page elements, modify attributes, and perform actions such as clicking buttons or submitting forms.
-
Simulated User Interactions and Event Capture: Puppeteer allows you to simulate user interactions and capture network requests and responses. This enables scraping of pages that require user input or dynamically load content through AJAX or WebSocket requests.
-
Performance and Debugging Capabilities: Puppeteer's optimized Chrome engine ensures efficient scraping, and its integration with DevTools offers robust debugging and testing capabilities. You can debug web pages, log console messages, trace network activity, and analyze performance metrics.
In the following guides, I will explore the process of web scraping using Puppeteer and Node.js, along with integrating a cutting-edge CAPTCHA solving solution, CapSolver, to overcome one of the major challenges encountered during web scraping.
Bonus Code
A bonus code for top captcha solutions; CapSolver : WEBS. After redeeming it, you will get an extra 5% bonus after each recharge, Unlimited

How to Solve Captcha in Puppeteer using CapSolver while Web Scraping
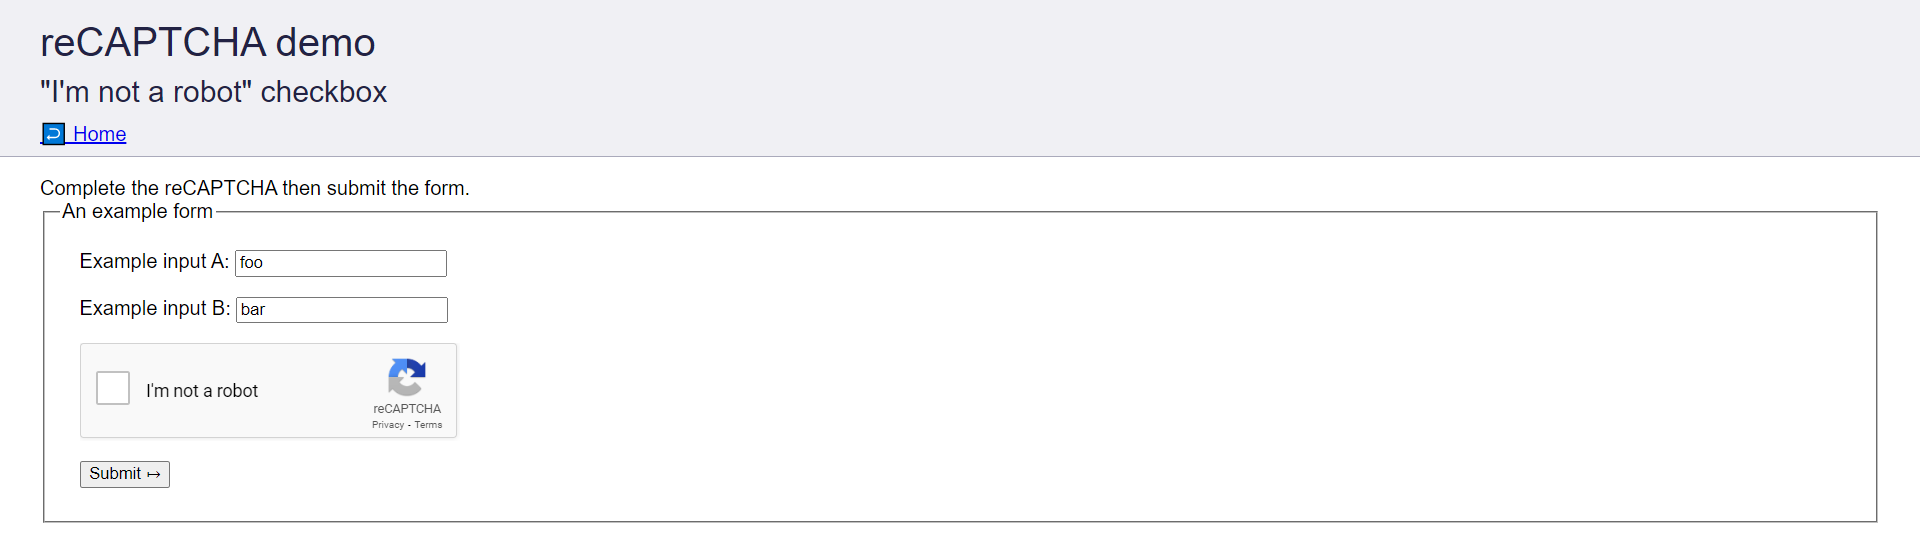
The goal will be to solve the captcha located at recaptcha-demo.appspot.com using CapSolver.
During the tutorial, we will take the following steps to solve the above Captcha:
- Install the required dependencies.
- Find the site key of the Captcha Form.
- Set up CapSolver.
- Solve the captcha.
Install Required Dependencies
To get started, we need to install the following dependencies for this tutorial:
- capsolver-python: The official Python SDK for easy integration with the CapSolver API.
- pyppeteer: pyppeteer is a Python port of Puppeteer.
Install these dependencies by running the following command:
python -m pip install pyppeteer capsolver-pythonNow, Create a file named main.py where we will write the Python code for solving captchas.
bash
touch main.pyGet Site Key of Captcha Form
The Site Key is a unique identifier provided by Google that uniquely identifies each Captcha.
To solve the Captcha, it is necessary to send the Site Key to CapSolver.
Let's find the Site Key of the Captcha Form by following these steps:
- Visit the Captcha Form.
- Open Chrome Dev Tools by pressing
Ctrl/Cmd+Shift+I. - Go to the
Elementstab and search fordata-sitekey. Copy the attribute's value.
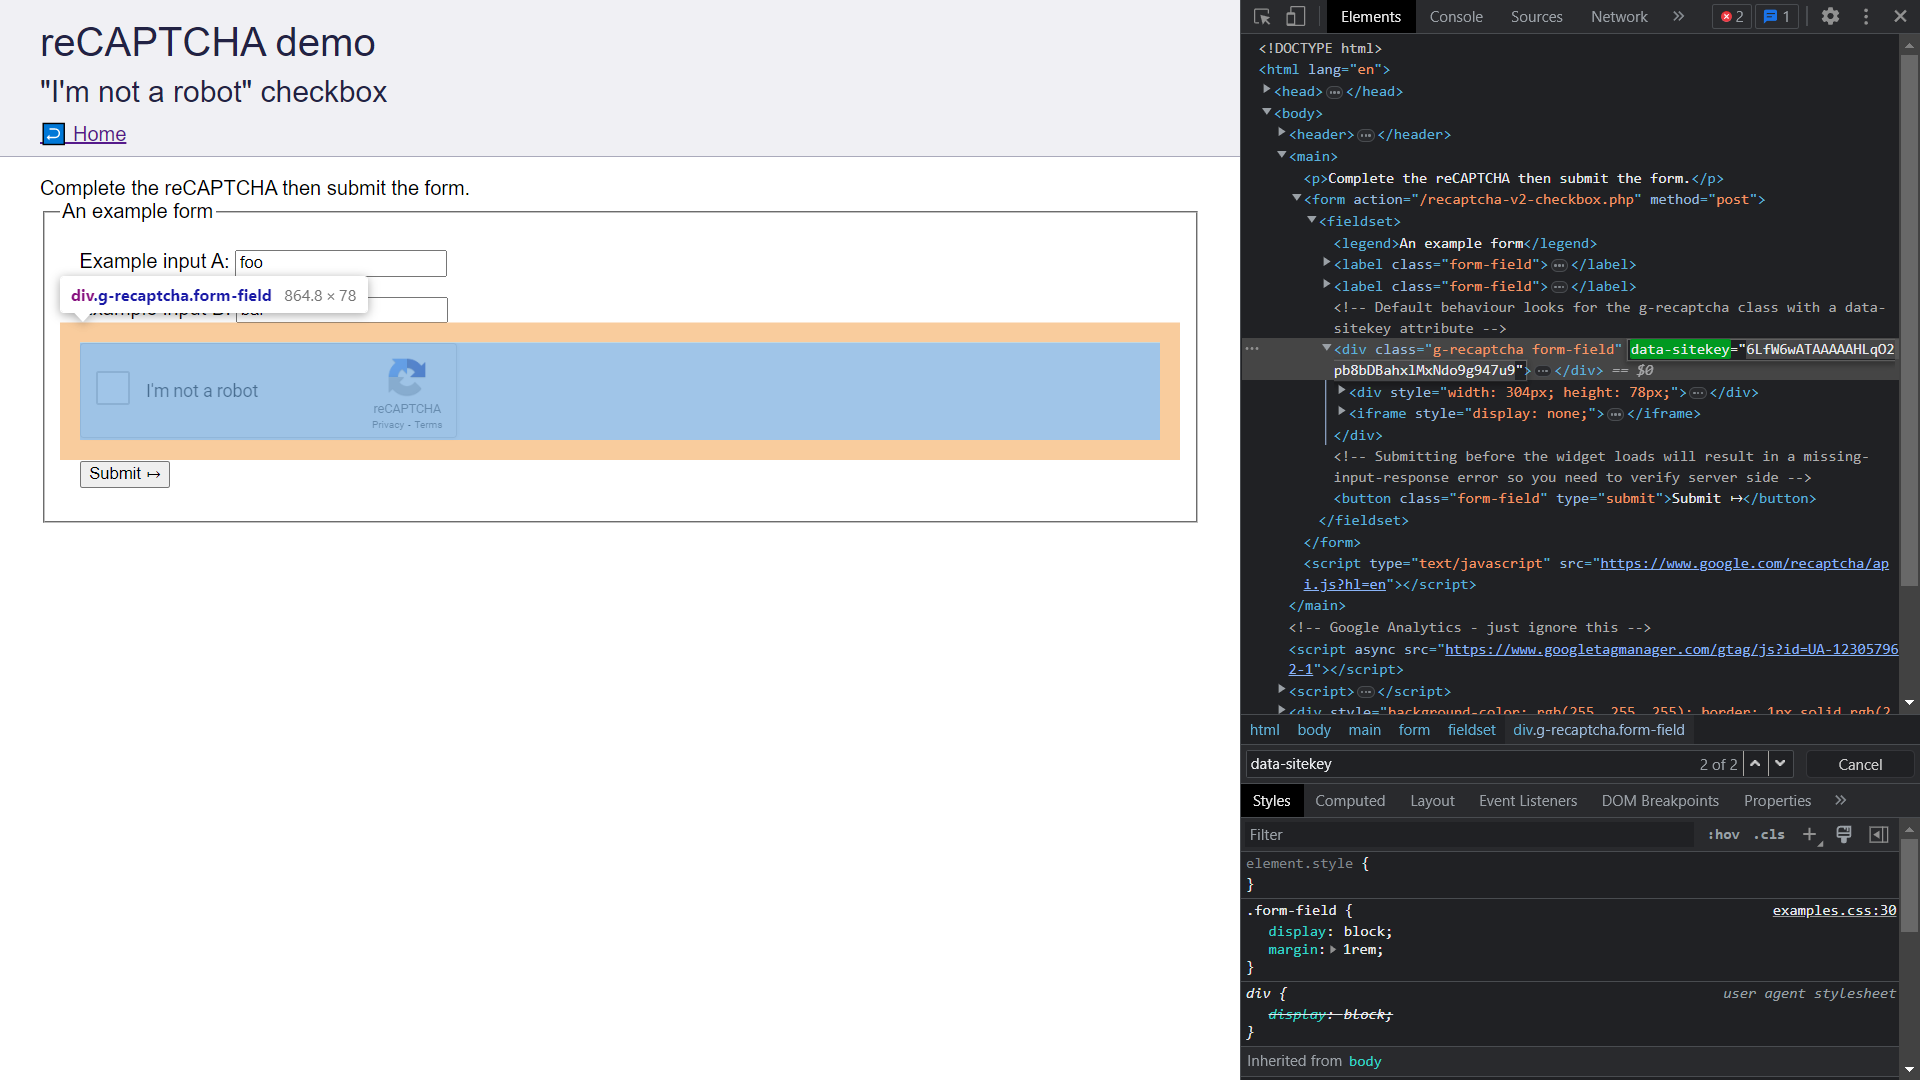
- Store the Site Key in a secure place as it will be used in a later section when we submit the captcha to CapSolver.
Setup CapSolver
To solve captchas using CapSolver, you need to create a CapSolver account, add funds to your account, and obtain an API Key. Follow these steps to set up your CapSolver account:
-
Sign up for a CapSolver account by visiting CapSolver
-
Add funds to your CapSolver account using PayPal, Crypto Currencies, or other listed payment methods. Please note that the minimum deposit amount is $6, and additional taxes apply.
-
Now, copy the API Key provided by CapSolver and store it securely for later usage.
Solving the Captcha
Now, we will proceed to solving the captcha using CapSolver. The overall process involves three steps:
- Launching the browser and visiting the captcha page using pyppeteer.
- Solving the captcha using CapSolver.
- Submitting the captcha response.
Read the following Code Snippets to understand these steps.
Launching the browser and visiting the captcha page:
python
# Launch the browser.
browser = await launch({'headless': False})

# Load the target page.
captcha_page_url = "https://recaptcha-demo.appspot.com/recaptcha-v2-checkbox.php"
page = await browser.newPage()
await page.goto(captcha_page_url)
Solving the captcha using CapSolver:
python
# Solve the reCAPTCHA using CapSolver.
capsolver = RecaptchaV2Task("YOUR_API_KEY")

site_key = "6LfW6wATAAAAAHLqO2pb8bDBahxlMxNdo9g947u9"
task_id = capsolver.create_task(captcha_page_url, site_key)
result = capsolver.join_task_result(task_id)

# Get the solved reCAPTCHA code.
code = result.get("gRecaptchaResponse")
Setting the solved captcha on the form and submitting it:
python
# Set the solved reCAPTCHA code on the form.
recaptcha_response_element = await page.querySelector('#g-recaptcha-response')
await page.evaluate(f'(element) => element.value = "{code}"', recaptcha_response_element)

# Submit the form.
submit_btn = await page.querySelector('button[type="submit"]')
await submit_btn.click()
Putting it all Together
Below is the complete code for the tutorial, which will solve the captcha using CapSolver.
python
import asyncio
from pyppeteer import launch
from capsolver_python import RecaptchaV2Task

# Following code solves a reCAPTCHA v2 challenge using CapSolver.
async def main():
    # Launch Browser.
    browser = await launch({'headless': False})

    # Load the target page.
    captcha_page_url = "https://recaptcha-demo.appspot.com/recaptcha-v2-checkbox.php"
    page = await browser.newPage()
    await page.goto(captcha_page_url)

    # Solve the reCAPTCHA using CapSolver.
    print("Solving captcha")
    capsolver = RecaptchaV2Task("YOUR_API_KEY")

    site_key = "6LfW6wATAAAAAHLqO2pb8bDBahxlMxNdo9g947u9"
    task_id = capsolver.create_task(captcha_page_url, site_key)
    result = capsolver.join_task_result(task_id)

    # Get the solved reCAPTCHA code.
    code = result.get("gRecaptchaResponse")
    print(f"Successfully solved the reCAPTCHA. The solve code is {code}")

    # Set the solved reCAPTCHA code on the form.
    recaptcha_response_element = await page.querySelector('#g-recaptcha-response')
    await page.evaluate(f'(element) => element.value = "{code}"', recaptcha_response_element)

    # Submit the form.
    submit_btn = await page.querySelector('button[type="submit"]')
    await submit_btn.click()

    # Pause the execution so you can see the screen after submission before closing the driver
    input("Captcha Submission Successfull. Press enter to continue")

    # Close Browser.
    await browser.close()

if __name__ == "__main__":
    asyncio.get_event_loop().run_until_complete(main())
Paste the above code into your main.py file. Replace YOUR_API_KEY with your API Key and run the code.
You will observe that the captcha will be solved, and you will be greeted with a success page.
How to Solve Captcha in NodeJS using CapSolver while Web Scraping
Prerequisites
- Proxy (Optional)
- Node.JS installed
- Capsolver API key
Step 1: Install Necessary Packages
Execute the following commands to install the required packages:
python
npm install axiosNode.JS Code for solve reCaptcha v2 without proxy
Here's a Node.JS sample script to accomplish the task:
js
const axios = require('axios');

const PAGE_URL = ""; // Replace with your Website
const SITE_KEY = ""; // Replace with your Website
const CLIENT_KEY = "";  // Replace with your CAPSOLVER API Key

async function createTask(payload) {
  try {
    const res = await axios.post('https://api.capsolver.com/createTask', {
      clientKey: CLIENT_KEY,
      task: payload
    });
    return res.data;
  } catch (error) {
    console.error(error);
  }
}
async function getTaskResult(taskId) {
    try {
        success = false;
        while(success == false){

            await sleep(1000);
        console.log("Getting task result for task ID: " + taskId);
      const res = await axios.post('https://api.capsolver.com/getTaskResult', {
        clientKey: CLIENT_KEY,
        taskId: taskId
      });
      if( res.data.status == "ready") {
        success = true;
        console.log(res.data)
        return res.data;
      }
    }

    } catch (error) {
      console.error(error);
      return null;
    }
  }


async function solveReCaptcha(pageURL, sitekey) {
  const taskPayload = {
    type: "ReCaptchaV2TaskProxyless",
    websiteURL: pageURL,
    websiteKey: sitekey,
  };
  const taskData = await createTask(taskPayload);
  return await getTaskResult(taskData.taskId);
}
function sleep(ms) {
    return new Promise(resolve => setTimeout(resolve, ms));
}
async function main() {
  try {

      const response = await solveReCaptcha(PAGE_URL, SITE_KEY );
      console.log(`Received token: ${response.solution.gReCaptcharesponse}`);

    }
catch (error) {
    console.error(`Error: ${error}`);
  }

}
main();
👀 More information
Conclusion:
In this tutorial, we have learned how to solve captchas using CapSolver while performing web scraping with Puppeteer and Node.js. By leveraging CapSolver's API, we can automate the captcha-solving process and make web scraping tasks more efficient and reliable. Remember to comply with the terms and conditions of the websites you scrape and use web scraping responsibly
More
The Other CAPTCHAApr 14, 2026
Can AI Solve CAPTCHA? How Detection and Solve Really Work
Explore how AI detects and solves CAPTCHA challenges, from image recognition to behavioral analysis. Understand the technology behind AI CAPTCHA solvers and how CapSolver aids automated workflows. Learn about the evolving battle between AI and human verification.

The Other CAPTCHAApr 09, 2026
CAPTCHA Solving API Performance Comparison: Speed, Accuracy & Cost (2026)
Compare top CAPTCHA solving APIs by speed, accuracy, uptime, and pricing. See how CapSolver, 2Captcha, CapMonster Cloud, and others stack up in our detailed performance comparison.