Web scraping is a powerful technique for extracting data from websites, widely used in data analysis, market research, and content aggregation. As of 2026, leveraging Cheerio and Node.js for web scraping continues to be a popular and efficient approach. This article will delve into the process of using Cheerio and Node.js for web scraping, providing a comprehensive guide and a practical example.
Table of Contents
What is Cheerio?
Prerequisites
Setting Up the Project
Cheerio's Selector API
Writing the Scraping Script
Running the Script
Challenges of Web Scraping with Cheerio
Handling CAPTCHAs in Web Scraping
Handling Dynamic Pages
Conclusion
What is Cheerio?
Cheerio is a fast, flexible, and lean implementation of jQuery designed specifically for server-side applications. It allows developers to parse and manipulate HTML documents using familiar jQuery-like syntax in a Node.js environment. Unlike browser-based tools, Cheerio does not perform actual web rendering but directly manipulates HTML strings, making it exceptionally efficient for many scraping tasks. By the way Puppeteer is a great Cheerio scraping alternative.
Prerequisites
Before diving into the code, ensure that you have Node.js and npm (Node Package Manager) installed on your system. If they are not installed yet, you can download and install them from the Node.js official website.
Setting Up the Project
Step 1: Create a New Project Directory
First, create a new directory for your project and initialize it as a Node.js project:
bashCopy
mkdir web-scraping
cd web-scraping
npm init -y
The -y flag automatically answers "yes" to all prompts, setting up a default package.json file.
Step 2: Install Dependencies
Next, install the necessary dependencies, including axios for making HTTP requests and cheerio for parsing HTML:
bashCopy
npm install axios cheerio
Struggling with the repeated failure to completely solve the irritating captcha?
Discover seamless automatic captcha solving with Capsolver AI-powered Auto Web Unblock technology!
Claim Your Bonus Code for top captcha solutions; CapSolver. |: WEBS. After redeeming it, you will get an extra 5% bonus after each recharge, Unlimited
Cheerio's Selector API
Cheerio is a fast, flexible, and lean implementation of core jQuery designed specifically for the server. It allows you to use jQuery-like syntax to manipulate HTML documents in a Node.js environment.
Here's a detailed explanation of Cheerio's selector API with code examples:
const h1 = $('h1'); // Select all <h1> elements
console.log(h1.text()); // Output: Hello, world!
Class Selector:
javascriptCopy
const title = $('.title'); // Select elements with class="title"
console.log(title.text()); // Output: Hello, world!
ID Selector:
javascriptCopy
const content = $('#content'); // Select element with id="content"
console.log(content.html()); // Output: <p>This is a paragraph.</p><a href="https://example.com">Link</a>
Attribute Selector:
javascriptCopy
const link = $('a[href="https://example.com"]'); // Select <a> element with specific href attribute
console.log(link.text()); // Output: Link
Traversing and Manipulating Elements:
Traversing Elements:
javascriptCopy
$('p').each((index, element) => {
  console.log($(element).text()); // Output the text content of each <p> element
});
Modifying Element Content:
javascriptCopy
$('h1.title').text('New Title'); // Modify the text content of the <h1> element
console.log($('h1.title').text()); // Output: New Title
Adding and Removing Elements:
javascriptCopy
$('#content').append('<p>Another paragraph.</p>'); // Add a new <p> element inside #content
console.log($('#content').html()); // Output: <p>This is a paragraph.</p><a href="https://example.com">Link</a><p>Another paragraph.</p>

$('a').remove(); // Remove all <a> elements
console.log($('#content').html()); // Output: <p>This is a paragraph.</p><p>Another paragraph.</p>
These examples illustrate how you can use Cheerio's selector API to select, traverse, and manipulate HTML elements in a manner similar to jQuery, but within a Node.js environment.
Writing the Scraping Script
Create a file named scraper.js in your project directory. This file will contain the script to scrape data from a target website. Add the following code to scraper.js:
javascriptCopy
const axios = require('axios');
const cheerio = require('cheerio');

// Target URL
const url = 'https://example.com';

async function fetchData() {
  try {
    // Make an HTTP request to fetch the HTML content
    const { data } = await axios.get(url);
    // Load the HTML document into Cheerio
    const $ = cheerio.load(data);

    // Extract data from the HTML
    const title = $('title').text();
    const headings = [];
    $('h1, h2, h3').each((index, element) => {
      headings.push($(element).text());
    });

    // Output the extracted data
    console.log('Title:', title);
    console.log('Headings:', headings);
  } catch (error) {
    console.error('Error fetching data:', error);
  }
}

fetchData();
Explanation of the Code
Importing Modules: The script starts by importing the axios and cheerio modules.
Defining the Target URL: The URL of the website to be scraped is defined.
Fetching Data: The fetchData function makes an HTTP GET request to the target URL using axios. The response data (HTML content) is then loaded into Cheerio.
Parsing HTML: Using Cheerio's jQuery-like syntax, the script extracts the content of the <title> tag and all <h1>, <h2>, and <h3> tags.
Outputting Results: The extracted data is logged to the console.
Running the Script
To execute the scraping script, run the following command in your terminal:
bashCopy
node scraper.js
If everything is set up correctly, you should see the scraped webpage title and the content of all heading tags printed to the console.
Challenges of Web Scraping with Cheerio
While Cheerio offers several advantages for web scraping, it also comes with its own set of challenges that developers may encounter:
Dynamic Websites and JavaScript: One of the primary challenges with Cheerio is handling dynamic websites that heavily rely on JavaScript. Modern websites often use JavaScript to load content dynamically after the initial page load. Since Cheerio parses static HTML, it may not capture dynamically generated content, which can limit the effectiveness of scraping.
Anti-Scraping Measures: Websites deploy various anti-scraping techniques to deter automated data extraction:
CAPTCHAs: Major issue you may meet in scraping which is designed to distinguish between humans and bots, CAPTCHAs require users to complete tasks like image recognition or text input.
IP Blocking: Websites may block IP addresses associated with scraping activities to prevent excessive requests.
User-Agent Detection: Detecting non-standard or suspicious user agents helps websites identify and block scrapers.
Dynamic Web Pages: Websites using dynamic JavaScript content generation can present challenges as content may not be directly accessible through Cheerio's static parsing.
As a web scraping developer, understanding these challenges is critical to addressing them effectively. There are many strategies for mitigating solutions to these problems, and in the next pages, we'll explain how to solve two of the biggest of these problems in scraping with the solution of captcha and how to deal with dynamic page:
Handling CAPTCHAs in Web Scraping
CAPTCHAs pose a significant challenge in web scraping as they are designed to distinguish humans from bots. When encountered, your scraping script must solve them to proceed efficiently. For scalable web scraping endeavors, solutions like CapSolver offer high accuracy and rapid CAPTCHA solving capabilities.
Integrating CAPTCHA Solvers
Various CAPTCHA solving services can be integrated into your scraping scripts. Here, we focus on CapSolver:
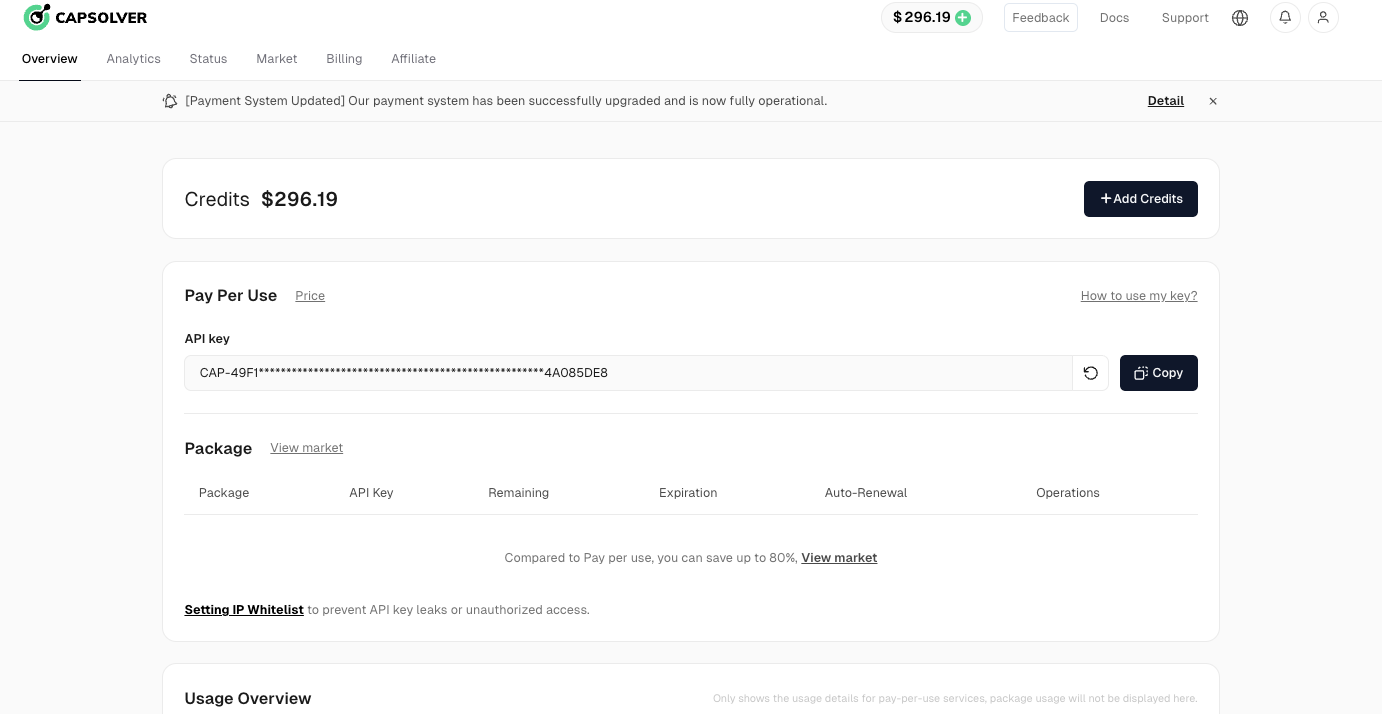
After registration, retrieve your API key from the home page panel.
Sample Code for CapSolver Integration
Integrating CapSolver into your web scraping or automation project is straightforward. Below is a Python example demonstrating how to use CapSolver’s API:
pythonCopy
# pip install requests
import requests
import time

# TODO: set your config
api_key = "YOUR_API_KEY"  # your CapSolver API key
site_key = "6Le-wvkSAAAAAPBMRTvw0Q4Muexq9bi0DJwx_mJ-"  # target site's reCAPTCHA site key
site_url = ""  # URL of your target site


def solve_captcha():
    payload = {
        "clientKey": api_key,
        "task": {
            "type": 'ReCaptchaV2TaskProxyLess',
            "websiteKey": site_key,
            "websiteURL": site_url
        }
    }
    res = requests.post("https://api.capsolver.com/createTask", json=payload)
    resp = res.json()
    task_id = resp.get("taskId")
    if not task_id:
        print("Failed to create task:", res.text)
        return
    print(f"Got taskId: {task_id} / Retrieving result...")

    while True:
        time.sleep(3)  # delay
        payload = {"clientKey": api_key, "taskId": task_id}
        res = requests.post("https://api.capsolver.com/getTaskResult", json=payload)
        resp = res.json()
        status = resp.get("status")
        if status == "ready":
            return resp.get("solution", {}).get('gRecaptchaResponse')
        if status == "failed" or resp.get("errorId"):
            print("Solution failed! Response:", res.text)
            return


captcha_token = solve_captcha()
print(captcha_token)
This script illustrates how to utilize CapSolver’s API to solve reCAPTCHA challenges. Integrating such a solution into your scraping projects enhances efficiency by automating CAPTCHA resolution, thereby streamlining data extraction processes.
Handling Dynamical Pages
For web pages that load content dynamically through JavaScript, you might need to use a headless browser like puppeteer. Puppeteer can simulate a real user browsing the web, allowing you to scrape content that appears only after JavaScript execution.
Example with Puppeteer
Here’s a brief example of how to use Puppeteer in conjunction with Cheerio:
This script launches a headless browser, navigates to the target URL, and retrieves the HTML content after JavaScript execution. It then uses Cheerio to parse the HTML and extract the desired data.
Conclusion
Web scraping with Cheerio and Node.js is a powerful combination for extracting data from websites efficiently. Cheerio's jQuery-like syntax makes it easy to navigate and manipulate HTML documents, while Node.js provides a robust environment for handling HTTP requests and processing data.
However, developers must be aware of the challenges posed by dynamic content and anti-scraping measures such as CAPTCHAs. Integrating solutions like CapSolver can help overcome these obstacles, ensuring that your scraping scripts remain effective and reliable.
I hope this article helps you get started with web scraping in 2026 and provides useful data for your projects!